Odoo to PowerBI Installation Manual
Haven't bought Odoo Power BI Connector yet?
Buy Odoo Power BI Connector
Want expert help for installation support only for USD 100?
Contact UsPlease ensure that you have PowerBI Desktop installed in your Windows machine.
Watch all steps in this video
Step 1: Request your license key
Click here to request your license key:
info@techneith.comFill out the following details:
- Name
- Name of Organization
- Odoo Production and Staging URL
- Purchase/Invoice number (If you are on trial put "Trial" in this field)
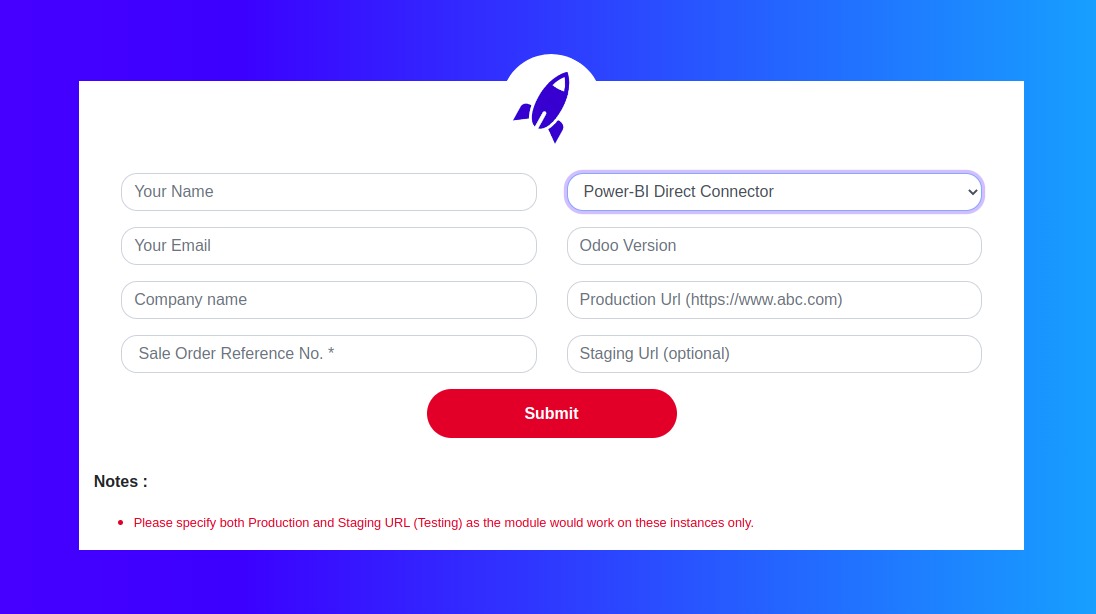
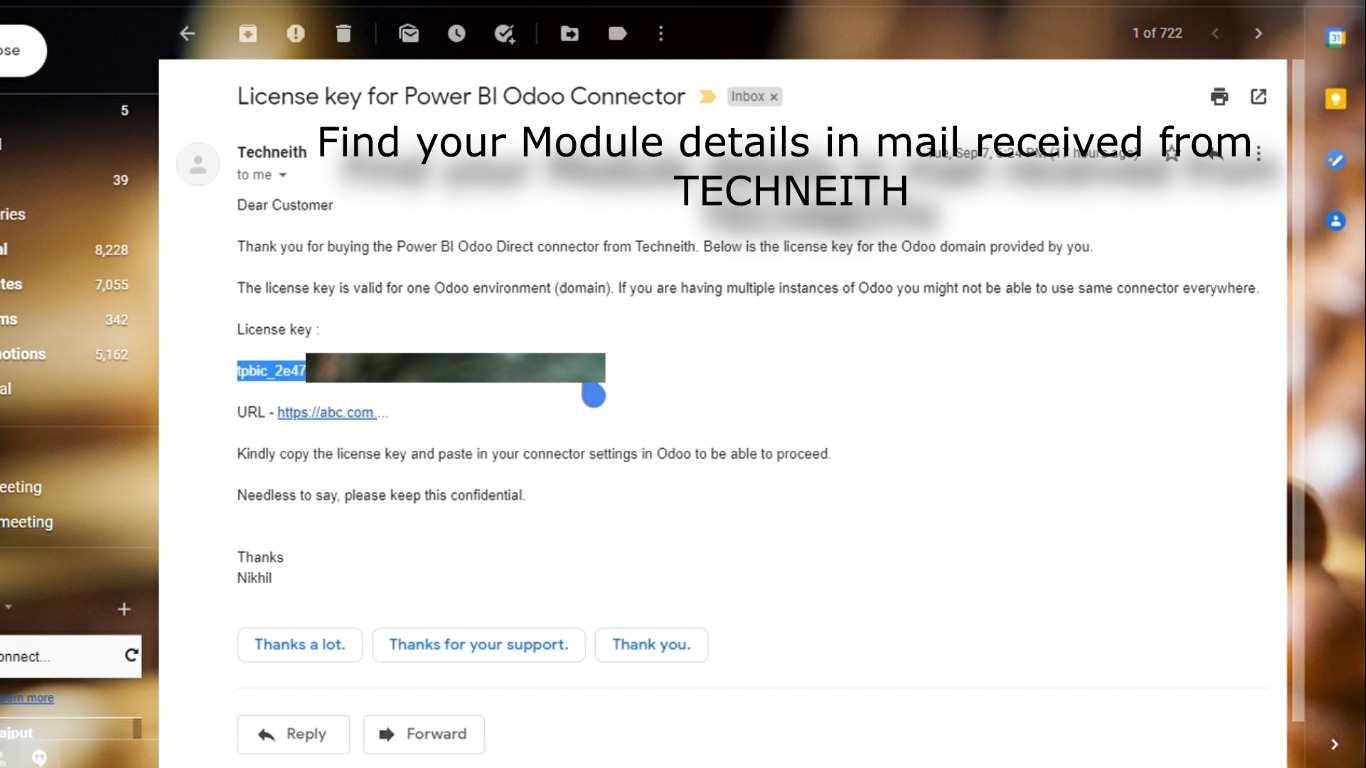
On submitting the form successfully you will receive your license key on the email you mentioned within 48 hours.
Step 2: Module Verification
Install the module on your Odoo and follow the steps given below to verify your module
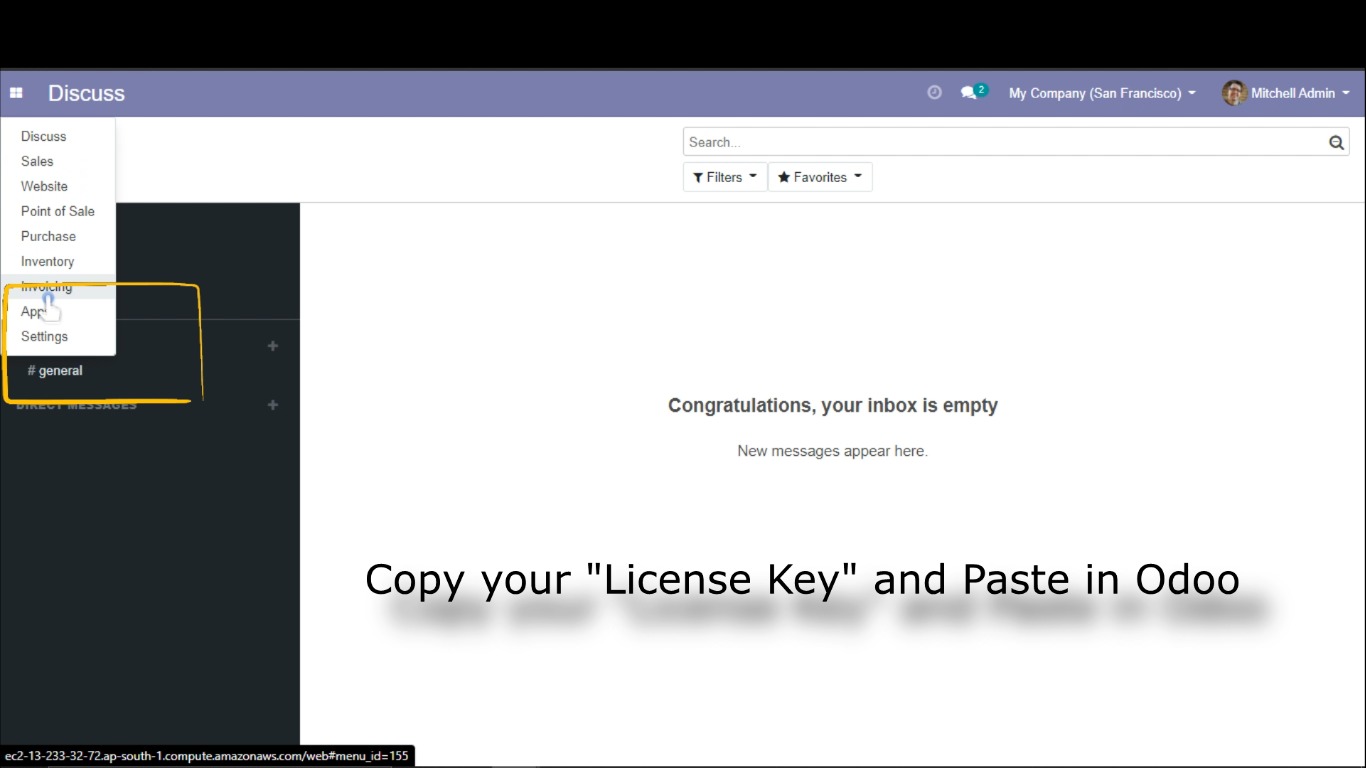
2.1 Copy the License Key you received from Techneith on your email
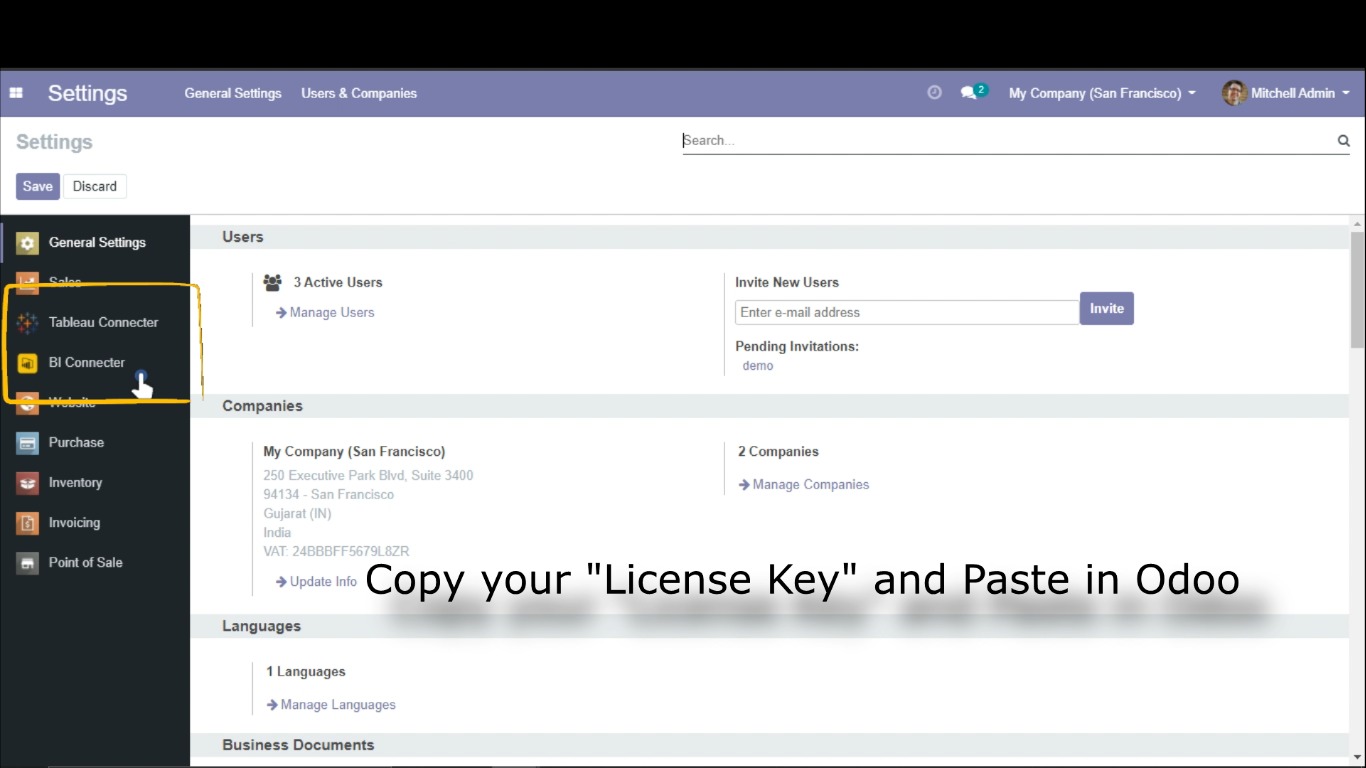
2.2 Head to your Odoo and make sure you have installed the Odoo PowerBI Direct Connector Module. Once you have installed the module go to the Settings page.
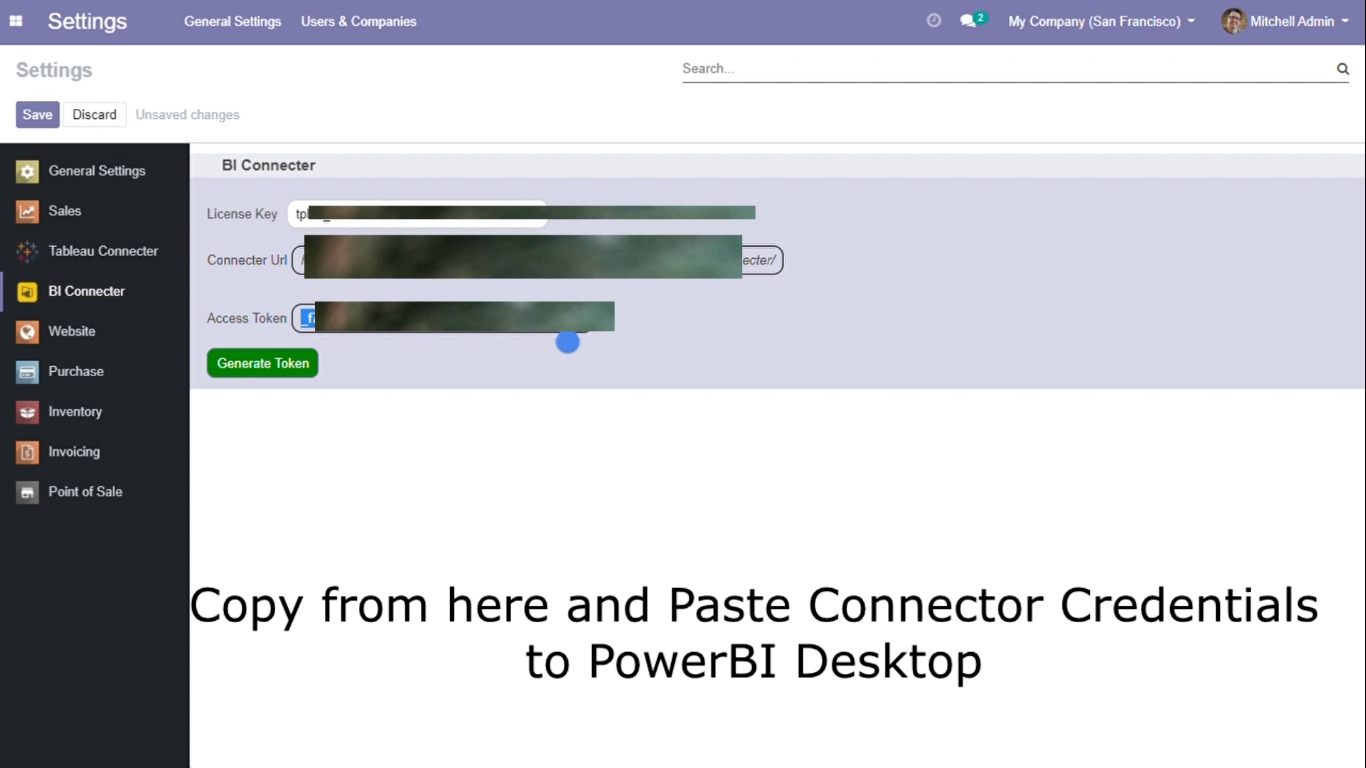
2.3 Click Bi Connector on left panel (this will be available only after Odoo Power BI Direct Connector Module is installed on your Odoo)
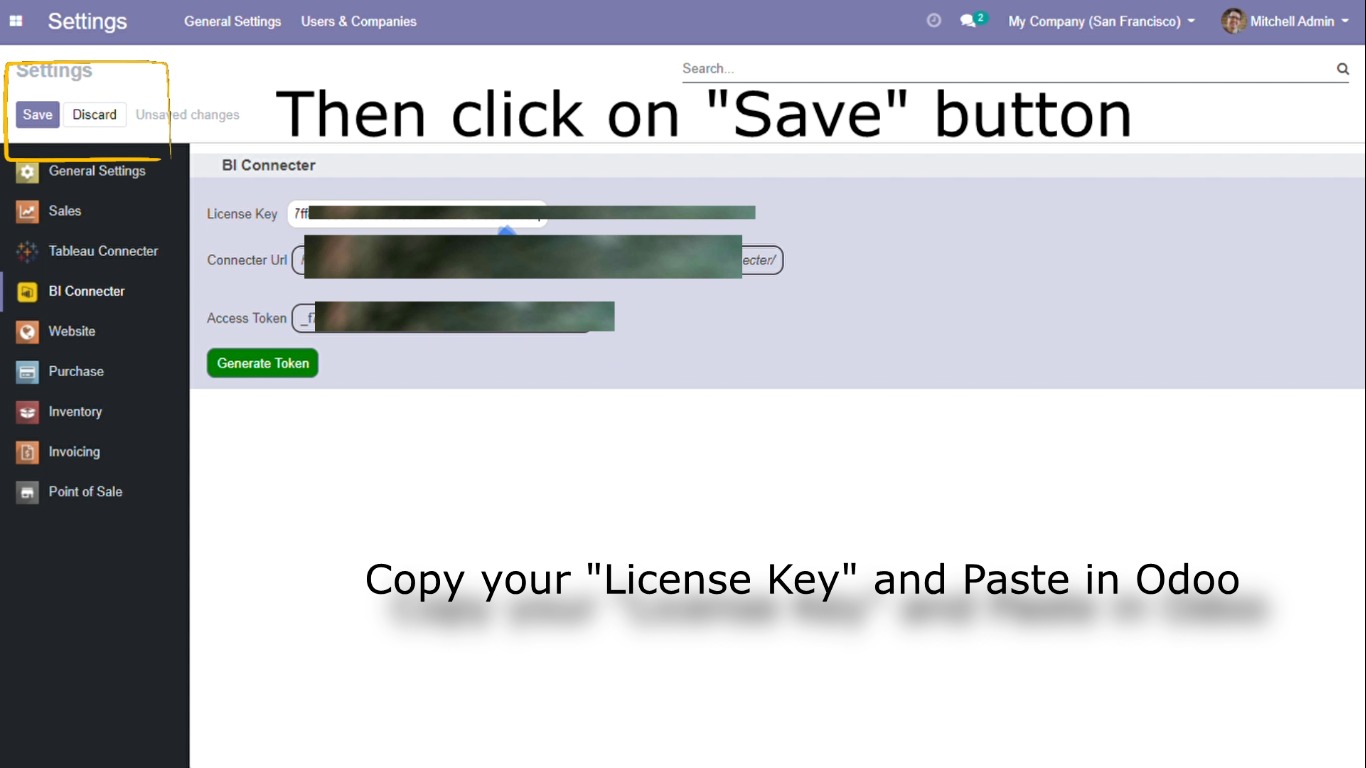
2.4 Paste your License Key in the License Key field (was copied in Step 2.1). Then click Save and then Generate Token.
Step 3: Desktop Configuration
Use the below link to download the EXE file and run it on the Windows machine on which Power BI Desktop is installed.
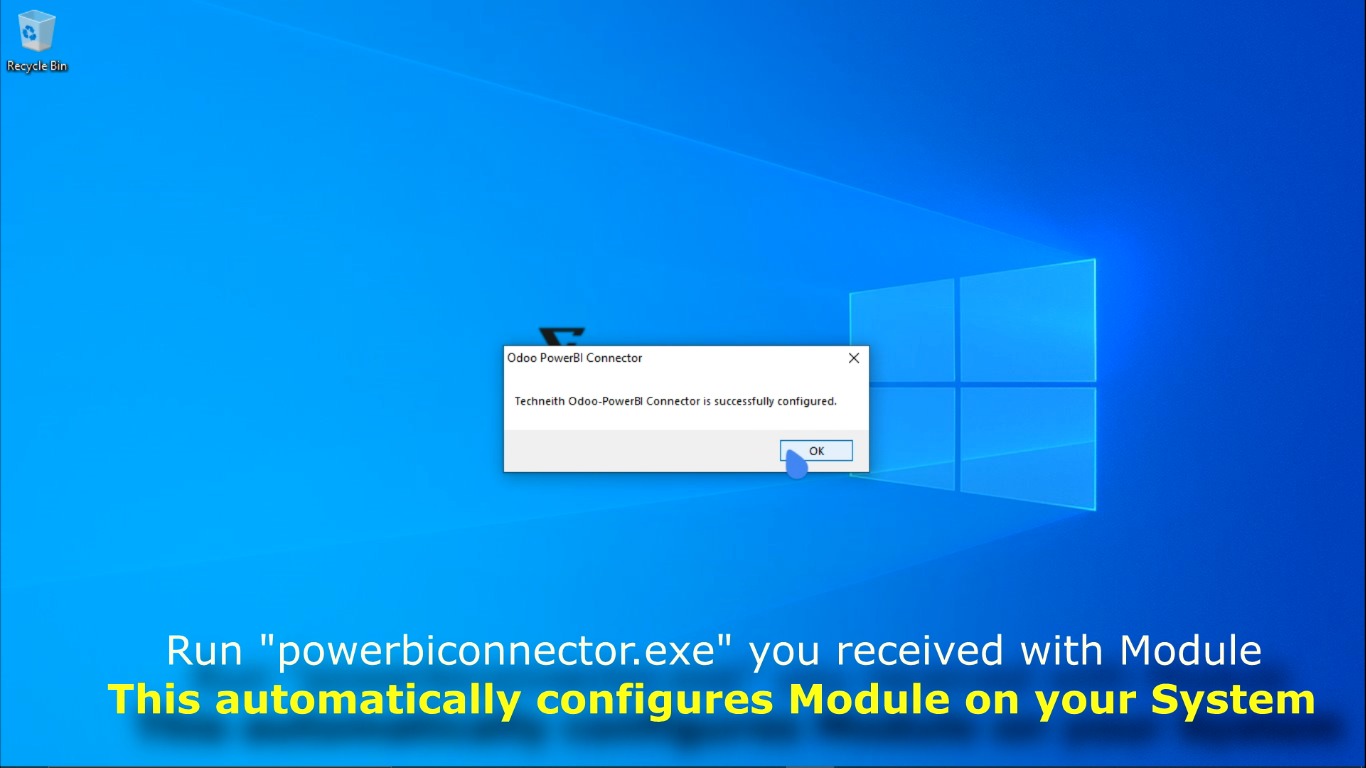
Click Here to Download3.1 Run powerbiconnector.exe on your Windows machine. (Right click on powerbiconnector.exe and click Run as Administrator). This configures your PowerBI Desktop with Odoo Connector.

3.2 After running powerbiconnector.exe you can see feedback message and notification (as shown in below images). This confirms our configuration is done successfully.
Step 4: Connecting with Odoo
Follow below steps to connect PowerBI with Odoo
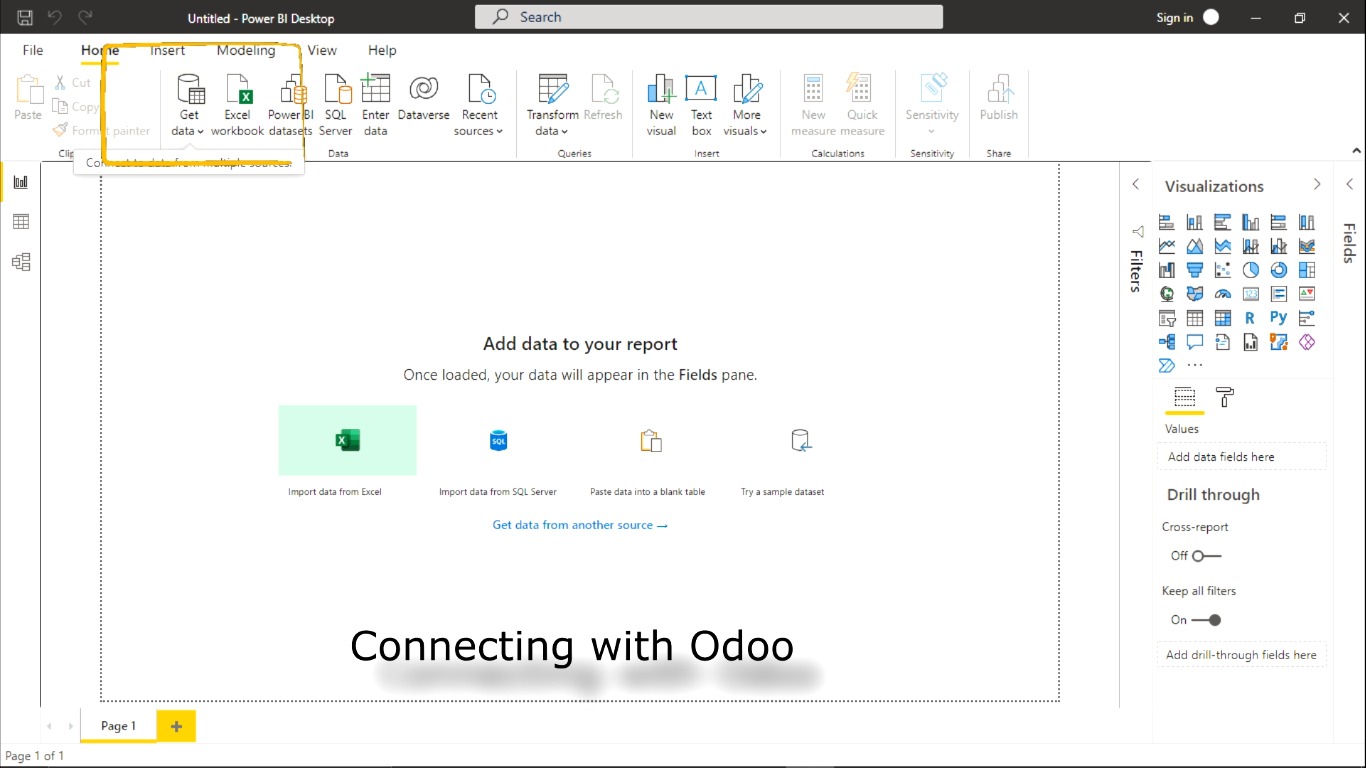
4.1 Click Get Data on Home Tab in PowerBI Desktop
4.2 Search for TechneithConnector in the Get Data window. Then click Connect.
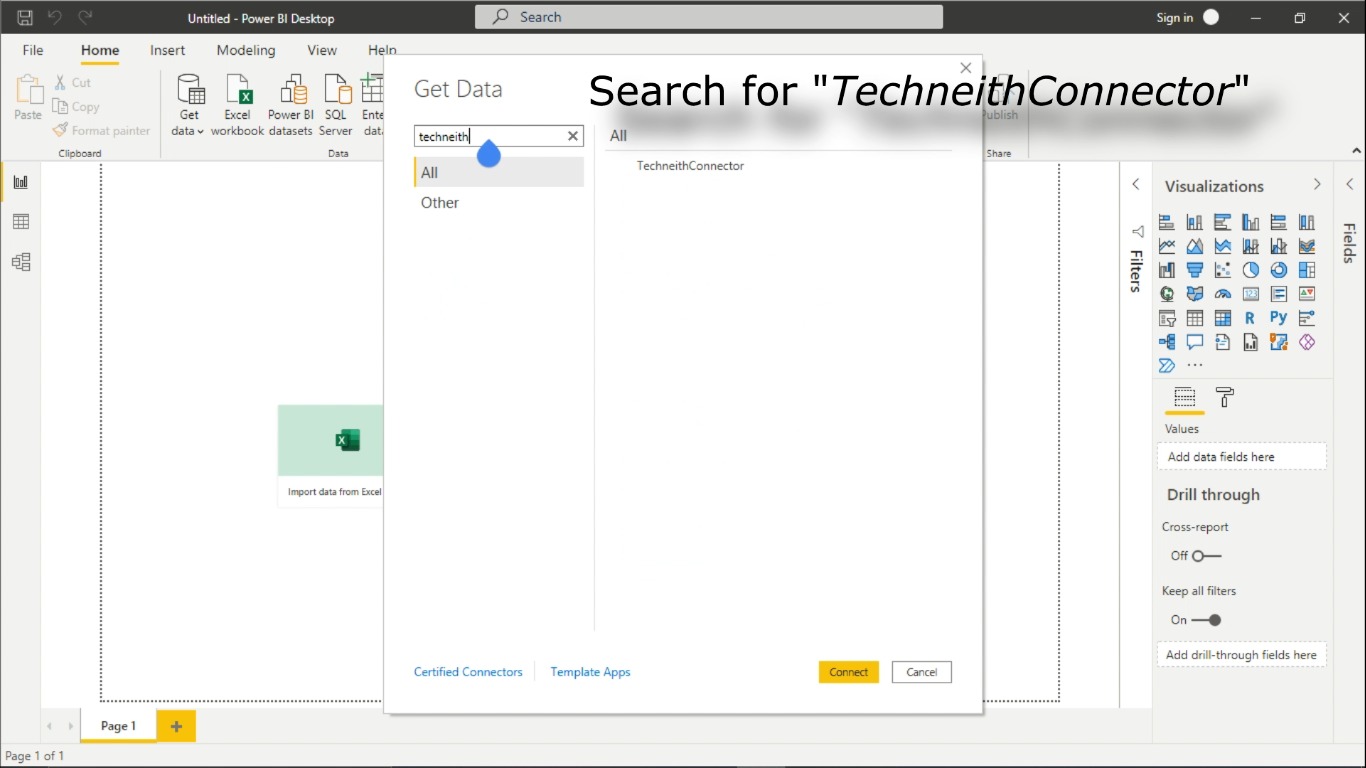
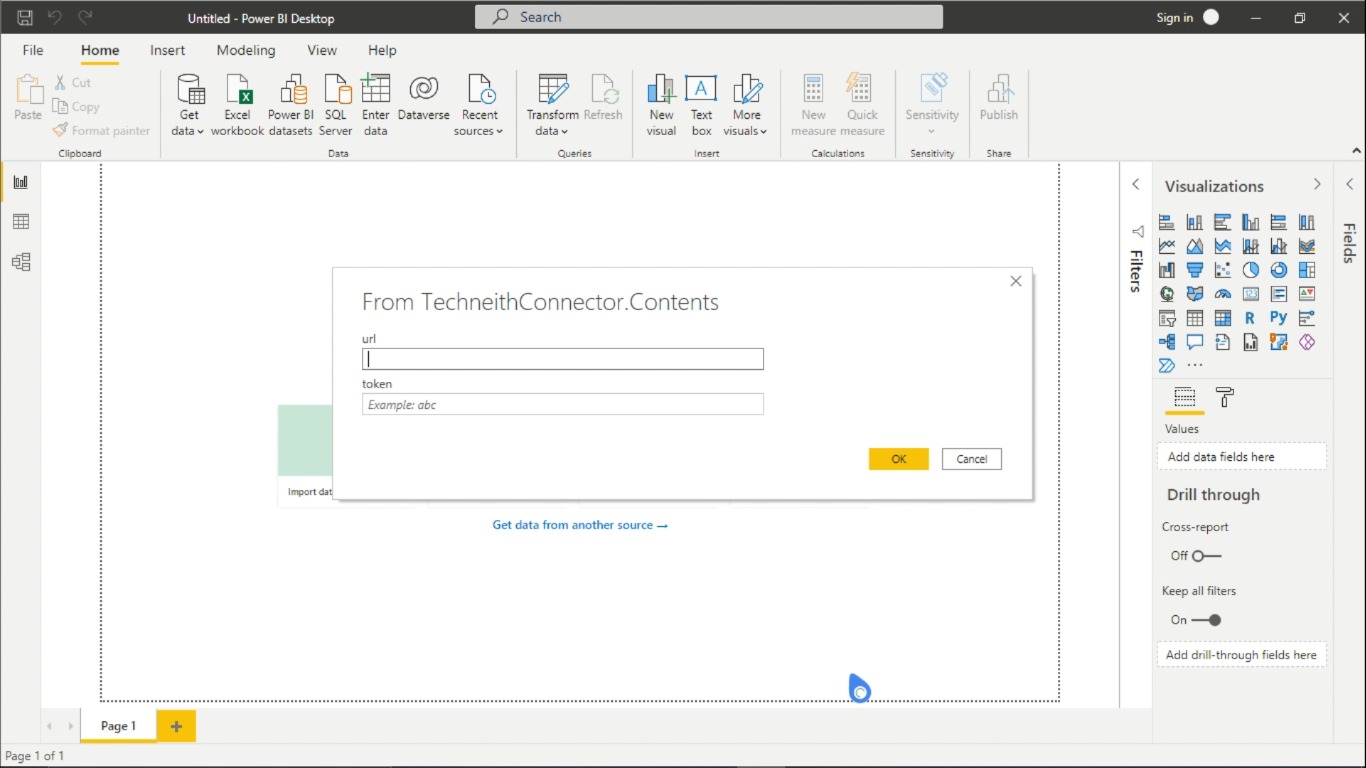
After this you will see the following screen. We will fill this content in Step 5.
Step 5: Linking and Data Fetching
Follow below steps to link connector and fetch data
5.1 Copy and Paste Connector URL and Access Token from Odoo (generated in Step 2.4) to Odoo Power BI Direct Connector window (left in Step 4.2). After this click OK.
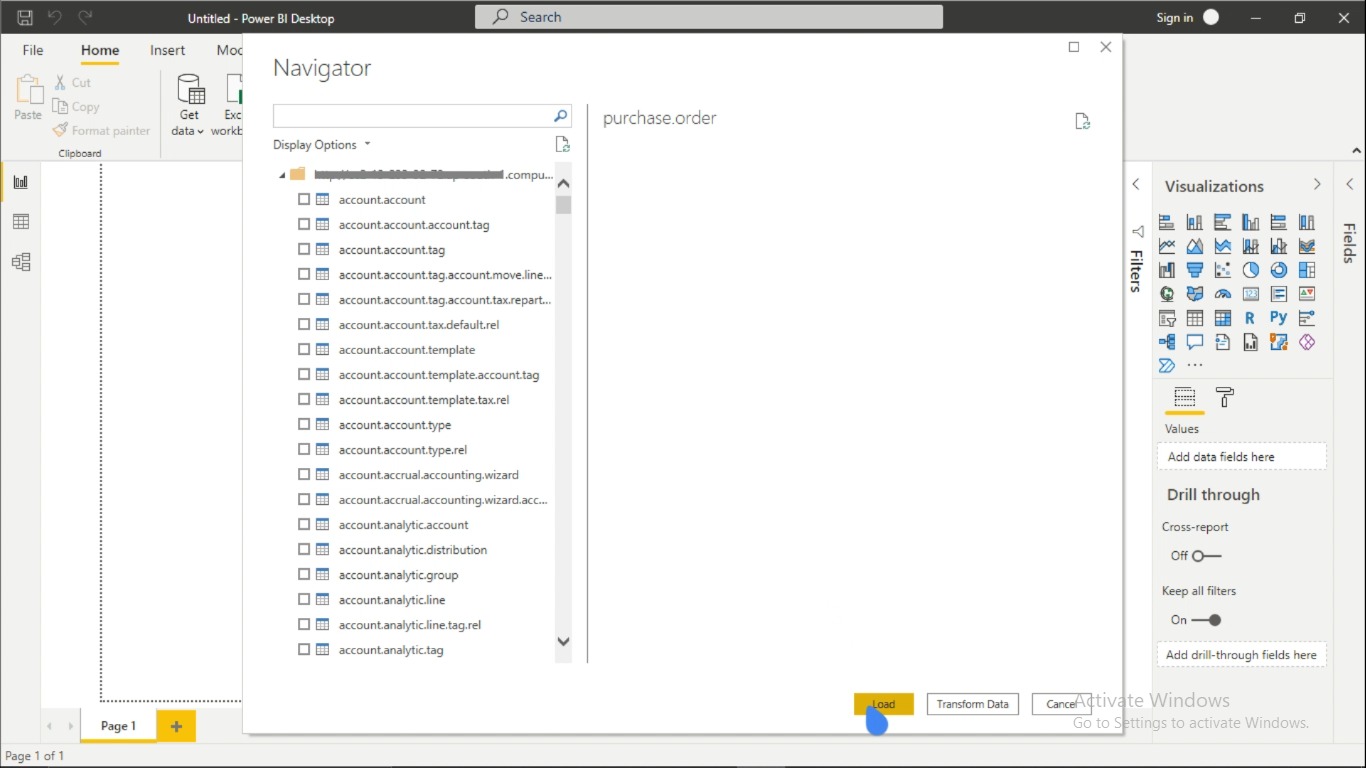
5.2 You can see tables from your Odoo database. Select tables you want to continue with in PowerBI and click Load.

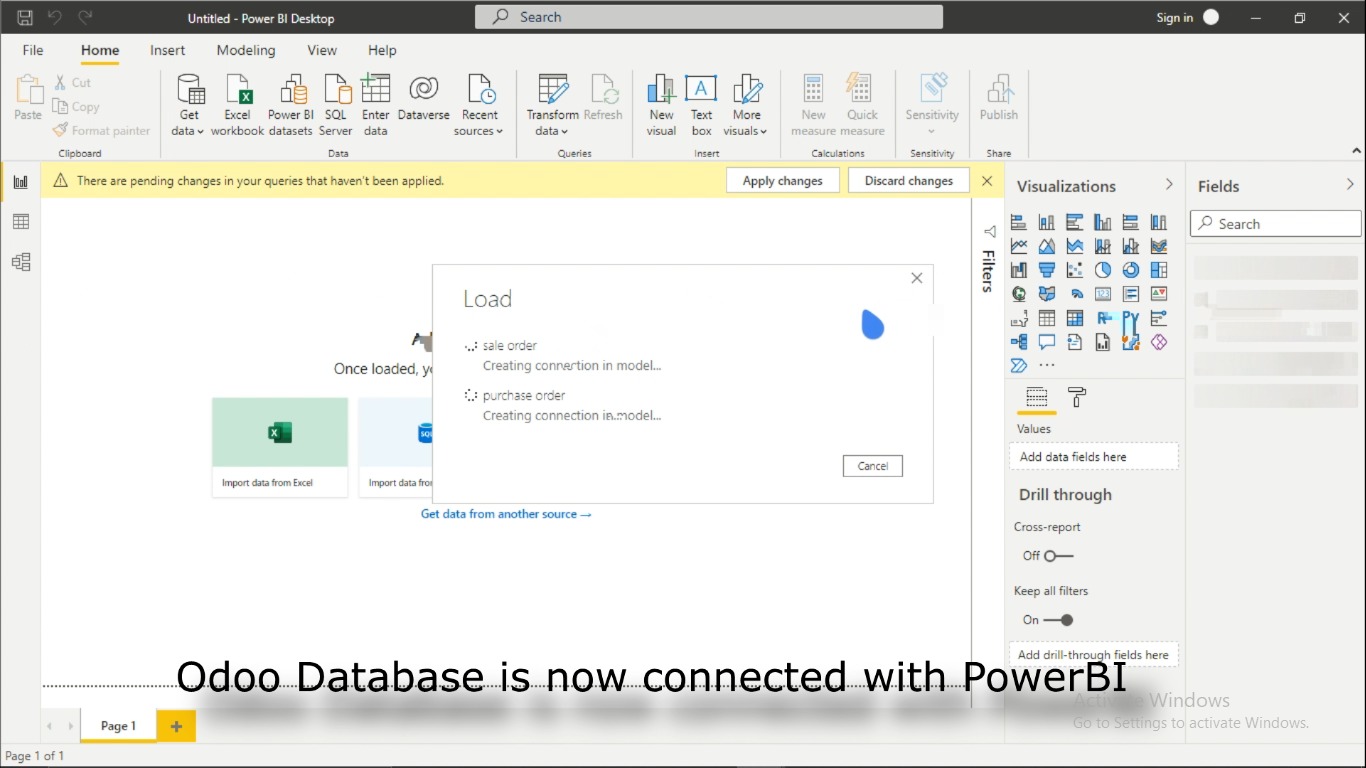
5.3 Tables are being fetched and you can see loading as shown in the below image.
Note: Time to load data depends on the size of data to be fetched
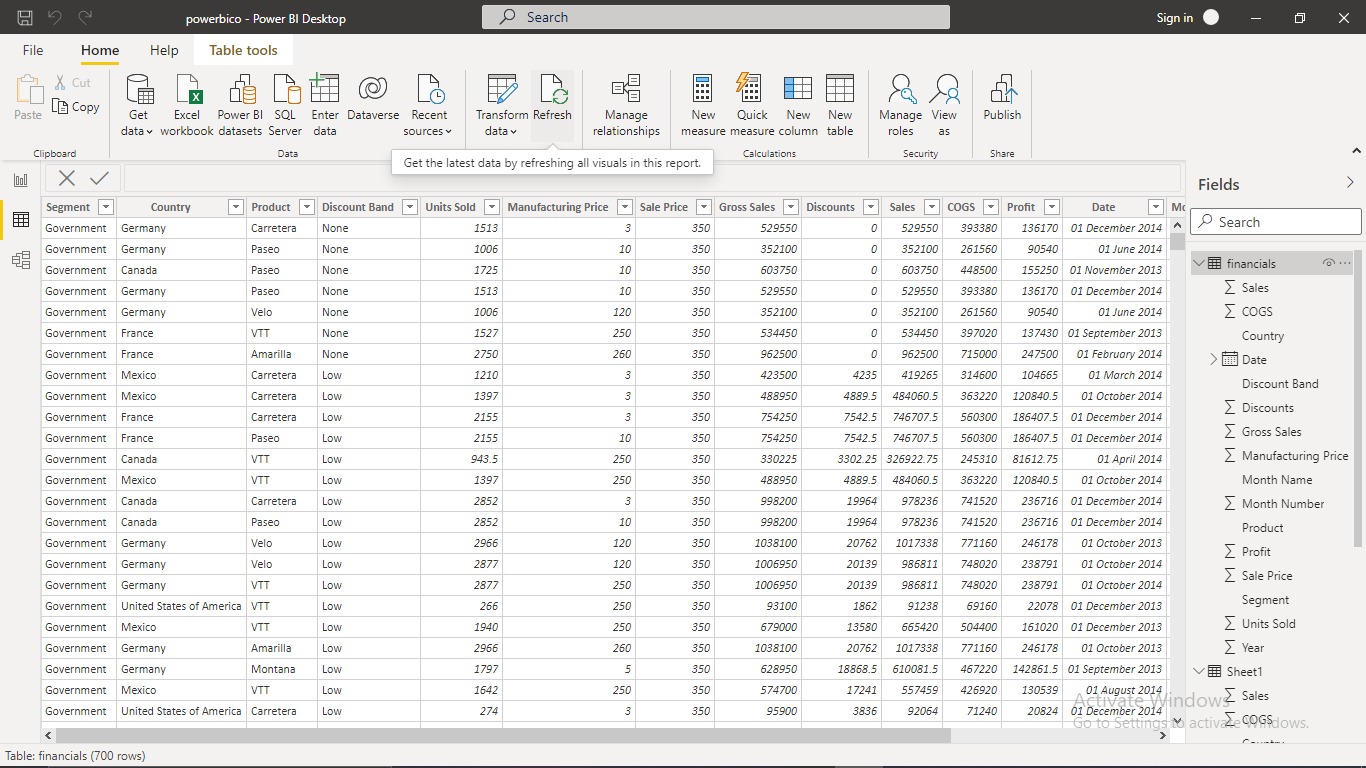
5.4 Odoo Database is now connected successfully with PowerBI Desktop and you can see content of your tables.
Step 6: How to Reflect Data Change in PowerBI Desktop if there is change in data in Odoo
Click on the Refresh button in Home tab. (This loads and reflects the changes happened to data in Odoo)
What Next? Try readymade dashboards handcrafted for Odoo
Checkout these plug and play dashboards specially made for your Odoo. Get a free trial for these popular dashboards on your Odoo dataset.
Profit and Loss Dashboard
- ➤ Growing & Declining Products
- ➤ Customized dashboards
- ➤ Real-Time Data
Budget Dashboard
- ➤ Sorted Datasets
- ➤ Reliable Data
- ➤ Combination of Budget & Sales